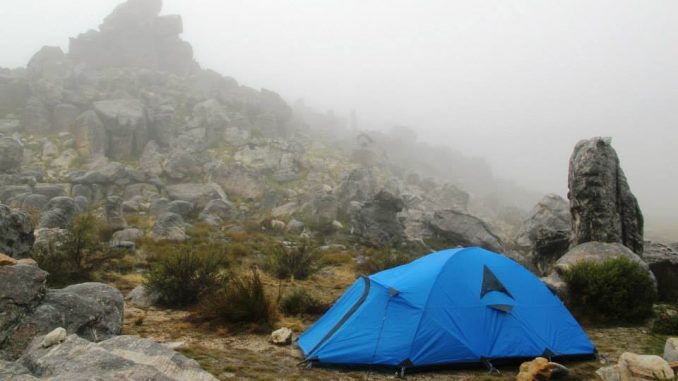
During April 2008 we made our way up a dripping, slippery Corner Pass as part of a 3-day round-trip hike to Mafadi, the highest point in South Africa at 3450m. The entire Injisuthi section of the Drakensberg was shrouded in thick, brooding mist. We didn’t waste time and topped out early afternoon. We proceeded straight towards Upper-Injisuthi cave, following a GPS with only 20m visibility as we were going up Heart-break Hill. It was a long-weekend, and there were many hikers around. The weather was increasingly gloomy and we wanted to be sure that we could find a good spot for our party of four in the cave. Upper-Injisuthi cave is superb. A deep, spacious cavern with a smallish opening (as Drakensberg caves go) providing good shelter, room to move around and amazing views.
We were the first group to make it to the cave and we claimed the best section. Our pots were already steaming for a cuppa as the other hikers started to arrive. Soon enough the cave was full and we saw a few dejected hikers turn around to find a camping spot. About an hour before dark a rotund guy arrived with his 5 friends. I can’t remember his name, but he looked like a Portuguese version of Magnum’s sidekick Higgins. Higgins wore some bright yellow polly-shorts which clung inappropriately to his thighs, white running shoes, a paper-thin cycling jacket and had a 30-liter daypack slung on his back. It was bulging from all the things forced inside, and a mattress, sleeping bag (wet), a tent and a few other odds-and-ends were dangling awkwardly on the outside. “I’m doing fast-and-light” Higgins explained with a big smile. “No more big, heavy backpacks form me.” He looked on longingly as I stuffed a dripping Ouma rusk into my mouth. “We’ll be on top of Mafadi as the sun rises” he said as if trying to convince himself that beating us will make it all worthwhile.
Higgins took his party and they trudged off to a sort-of-level section to pitch two faded fibreglass-pole dome tents. They squeezed inside and that’s the last we saw of them that day. That night the mountain shook as gale force winds tore around its flanks and heavy rain pelted down. We woke to a beautiful, calm dawn with the sun peaking over a sea of low cloud. Little clumps of ice lay scattered outside the cave. I looked across the hillside to camp Higgins. One tent lay in jumbled tatters on the ground, poles broken by the high winds. A bunch of wet, jaded men tumbled out of the remaining tent. I walked across and peeked inside. At least a centimeter of water covered the floor and everything – food, sleeping bags and clothing – was soaked. Higgins was shivering violently, trying to crack a smile through cold lips.
They never made it to the top of Mafadi – packed up what was left of their tents and went straight down the mountain. Writing this I feel a pang of regret that we didn’t take them a plunger of steaming coffee to provide some courage to finish their mission. I was reminded of the adage: “there is no such thing as bad weather, only bad gear”.
Technical and sleeping gear: general
Improvements in materials and technology have made a large selection of purpose-specific gear options available. Backpacks have become lighter, stronger and ergonomically designed to minimise fatigue and injury. Stoves range from 50g titanium screw-on burners to complex multi-fuel stoves that can run on anything from paraffin to petrol. Lightweight tents made from silicone impregnated rip-stop nylon and high-tech aluminium poles give us storm-proof shelters that weight as little as 2kg. Inflatable insulated sleeping mats are durable yet lightweight, affording us much more comfort than the old-school foam mats. And LED headlamps allow us to keep going well after dark, or cook in convenience. There’s a world of essential equipment and useful gadgets out there. I will cover just some of them.
Backpack
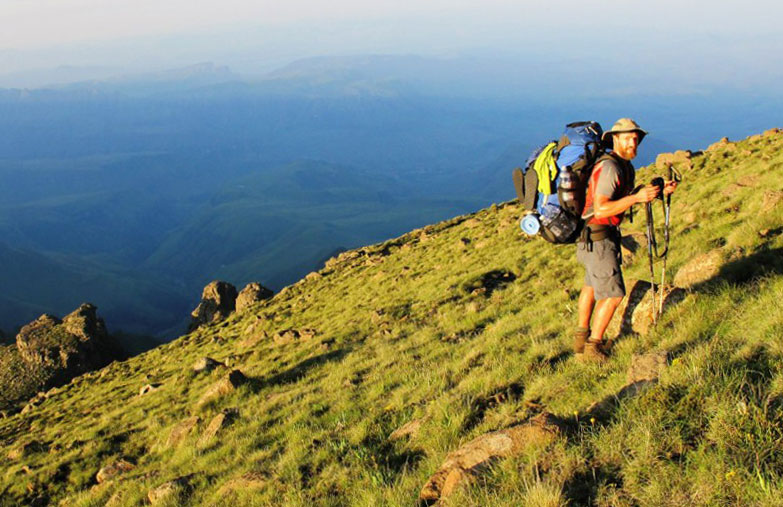
Like shoes, you need to find something that is fit for purpose and fits you. You need to distinguish between size (the size of your body) and volume (how much the pack holds).
- Fit the backpack properly: the weight should be resting on your hips, with the shoulder straps being an aide to keep the pack upright. Make sure the pack isn’t too long or short for your torso. Pack sizing problems may take a few hours / days to show up so take care to use the right size pack and not just use a pack that felt okay whilst empty in a quick fitting. Find a trained shop assistant if in doubt.
- Some manufacturers make ladies’ specific packs as well as packs with adjustable torso and hip-belt sizes.
- The volume of the pack is measured in litres. If you are a bigger person you will need a bigger volume pack – your clothing will be bigger and you will probably eat more. A 60kg shop assistant told my 95kg brother to buy a 65-liter pack for long distance wilderness hikes, which turned out to be far too small for him. He now uses a 100-liter pack.
- Make sure your pack is big enough so that everything can fit inside (except perhaps a tent & foam mattress). Things strapped to the pack increases the chances of snags and damage. Bigger volume packs are designed for the extra weight, are more versatile and can often be compressed for smaller loads. But beware of overpacking when you have lots of volume available though.
- Use a fitted rain cover to keep content dry. Many packs have a built-in rain cover.
Stove & kitchen
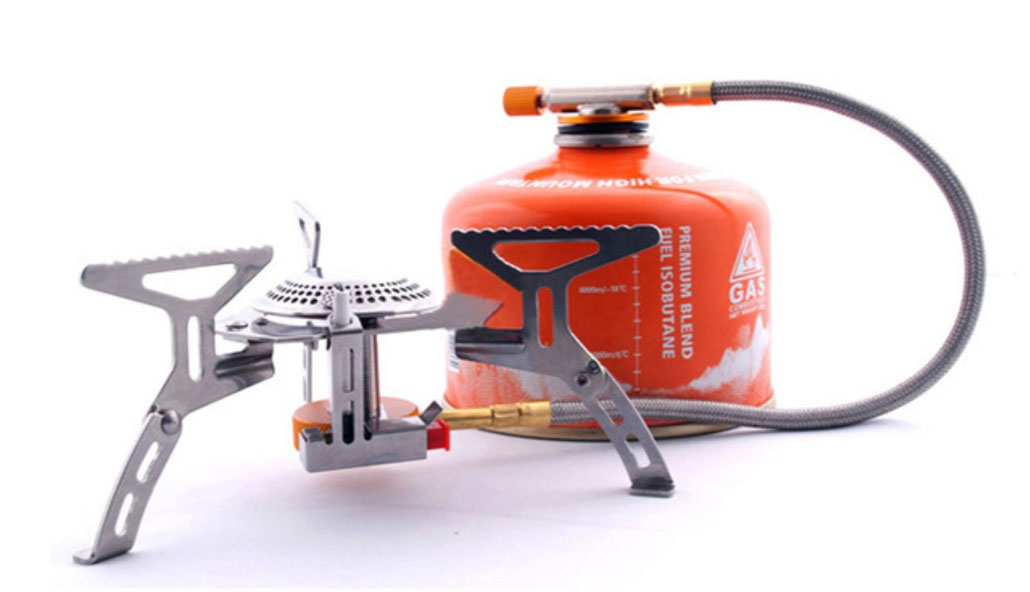
- A hosed gas stove that rests on the ground (as opposed to screwed on top of the gas canister) is my preferred choice for most hikes. Gas is reliable and quick to use; the on-the-ground setup makes it stable and less exposed to wind.
- Make sure you take enough gas and that the gas canister fitting is appropriate for the stove.
- More multi-fuel stoves have been coming to market and are especially useful on expeditions to remote areas where gas is not available. They are more expensive, trickier to operate but field repairable and much cheaper to run. My MSR Dragonfly can do a week’s cooking for two on 650ml of benzene.
- Durable, lightweight eating utensils. Hard-wearing plastic and titanium alloy are choice materials.
- Lightweight pots for cooking and boiling water. We grew up with aluminium pots, but if you have the budget treat yourself to stainless steel hiking pots. Also pack bio-degradable dishwashing soap, a sponge and a cloth.
- A metal kettle is nice but beware to not take it unnecessarily – hiking pots are adequate to boil water.
- If you enjoy good coffee, look out for a GSI Java Press (made from strong plastic) or an Aeropress with a re-usable steel filter.
Top tip: buy your kitchen goodies at an outdoor store with a dedicated hiking focus. A lot of outdoor gear is made for car-campers where weight is not a big consideration.
Tent
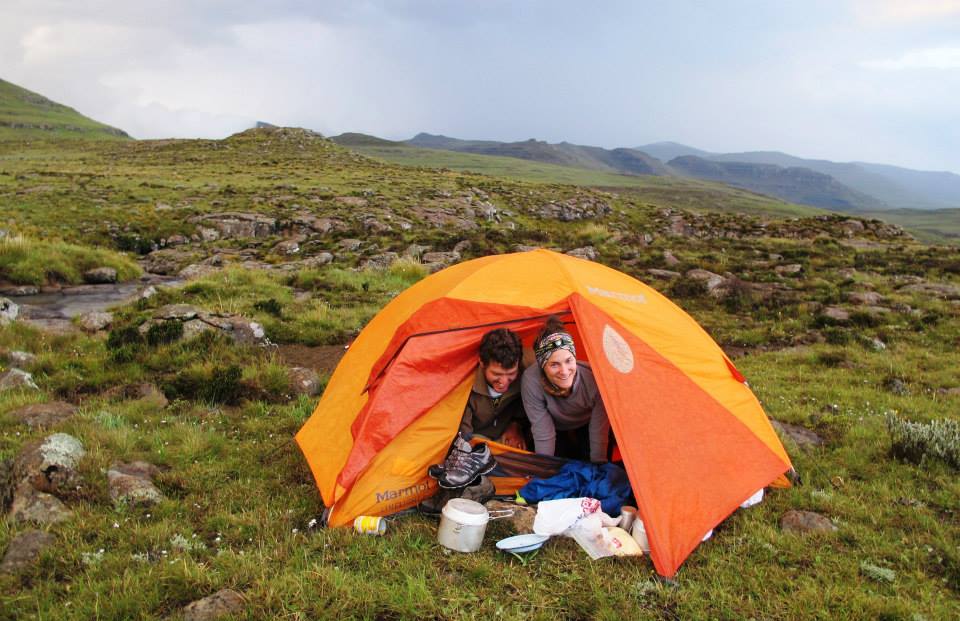
Hiking tents are of necessity lightweight and therefore sacrifices are made with respect to robustness and durability. Older tents must be inspected regularly to make sure they are still strong and waterproof. A hiking tent that is well looked after will last for many years though. I take care to never let my hiking tent stand in the sun for days at a time – UV is a major factor in degeneration of tent materials.
- First up one must decide on a single- or double-wall design. Double-wall tents have a separate inner section, comprising of the floor and a material/webbing canopy, and outer section or flysheet made of strong, waterproof material. Single wall tents are made of a single structure of breathable waterproof material, and are typically lighter, stronger and far more expensive. Most hikers will use double wall tents, with single wall tents the domain of mountaineers.
- Hiking tents are either 3 or 4-season. 4-season tents are designed for high mountains with very strong winds and icy conditions. The strongest tents have multiple pole crossings – 3 and 4-pole tents have become the norm; with 2-pole tents used for areas with milder weather.
- The waterhead indicates the amount of water-pressure the flysheet and floor can hold. This becomes important in heavy rain. A waterhead of 1500mm should be sufficient for 3-season use; with 2000mm to 3000mm the norm for 4-season tents.
- It is important to understand how to stake out guy-lines to strengthen your tent set-up.
- A large vestibule is a bonus in wet weather – useful to stash wet packs and to cook under cover. Important: even though most new tents are treated to be fire resistant, an open flame should never, ever be used inside the tent. Extreme care should be taken when cooking in a vestibule.
- If the above terms are foreign to you, google them and read-up!
Sleeping bag
Sleeping bags have either synthetic (hollow-fibre) or down fillings. Down has better qualities in terms of weight, temperature range and compression, but will cost significantly more. For serious hikers a down sleeping bag is definitely the way to go.
- Be careful to note what a sleeping bags temperature rating denotes. Manufacturers show a “survival/extreme rating” and/or a “comfort rating”. An extreme rating of 0-degrees simply means you will survive at the temperature, but will certainly also be cold! Your bag’s comfort temperature should correspond with the lowest expected temperature on the hike. Comfort temperature is typically survival temperature plus 10 to 15-degrees Celsius.
- A sleeping bag liner is useful to keep the bag clean and will add a few degrees of heat.
- One can sleep in warm clothing if temperatures are colder than your bag’s rating. Sharing a tent/hut with other people will also heat things up with a degree or two.
- Sleeping bags are either square or mummy-shaped. The mummy-shape will follow the contours of your body, giving less “dead space” allowing you to sleep warmer. A head and chest baffle also helps to lock in warmth.
Sleeping mat/mattress
Your sleeping mat is not only for comfort but also for warmth. In very cold temperatures you will need additional insulation from below since your weight will compress your sleeping bag. Hence, either a closed-cell foam hiking mattress or an insulated inflatable mattress is needed.
- The inflatable insulated mattresses have become the norm in recent years. Take care to pick the right size and weight – some mattresses are designed for car camping. The upper weight limit should be around 800g; you can find ones that weigh less than 500g.
- Make sure you take a patch kit for inflatable mattresses. Also take care to inspect the ground where you will sleep for sharp/hard objects.
- Closed-cell foam mattresses are still useful but are hard to sleep on unless you’re conditioned for it. They are light and cheap and still a useful part of the kit. The also make a nice seat cushion when rolled up.
Top tip: use a closed-cell foam mattress as a protective base and a lightweight inflatable on top of that.
Headlamp/torch
LED headlamps have replaced handheld torches and other devices and for good reason. LED lights are frugal with battery power and the headlamps allow you to have both hands free – very useful when cooking.
- Take a spare set of batteries. Headlamps have a way to accidentally switch on in your pack (unless the switch is locked).
Other goods to pack:
- Water bottle(s) with at least 1,5l combined capacity; more for water scarce areas. Remember that you lose fluids even when you are not sweating due to exhaling moisture. Make sure you stay well hydrated, especially at altitude.
- In low-lying and water-scarce areas it is advisable to take water purifying tablets or a water filter. Water from springs and streams above any human settlements will generally be fine to drink.
- A charged cell phone with emergency numbers, and whistle (many hiking packs have a whistle built into the sternum strap).
- For toiletries imagine your morning and evening routine and make sure you have everything you need. Sample toothpaste tubes and hotel soaps/shampoos are great, or you can decant into smaller containers.
- Anti-chafe cream such as cycling bum-cream works very well to prevent chafing and blisters. Areas to take care of are your heels and toes, hips (hip-belt chafe), thighs, nipples and under your arms.
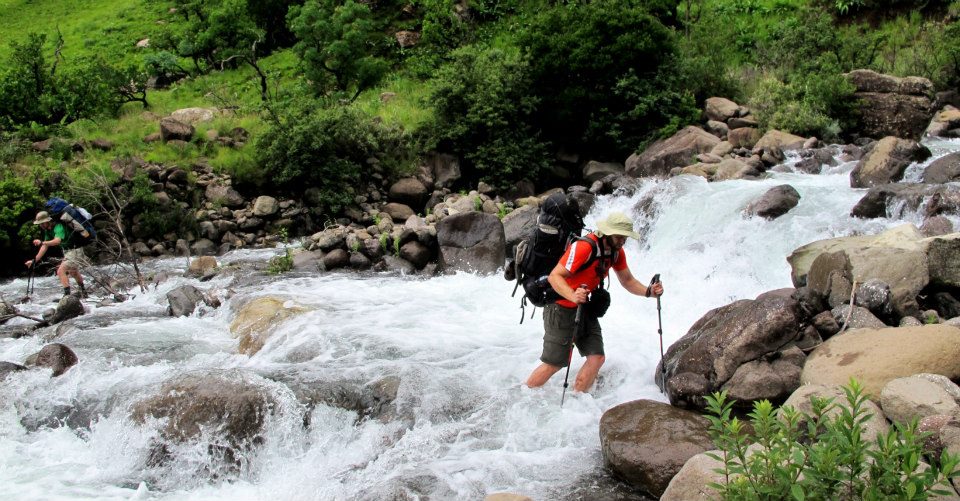
- Hiking poles (aka trekking poles) are very useful on steep terrain or when carrying a heavy backpack. They will be awkward to use at first, but you’re once used to them they are a great aid. (Read our article on trekking poles: Trekking Poles – Do They Work?)
Things needed in the group:
- A map and compass/GPS device – especially for unmarked routes and wilderness areas.
- A medi-kit with the necessary to deal with bleeding and limb injuries, as well as and any specific medication individuals might need. If anybody has a medical condition (e.g. diabetes) make sure your fellow hikers know about it and know how to deal with it.
- Lightweight multi-tool or swiss army knife with emergency repair kit. Duct tape and cable ties will go a long way.
- Some strong rope for emergency situations – can be used to make it safer on steep terrain or build an emergency shelter.
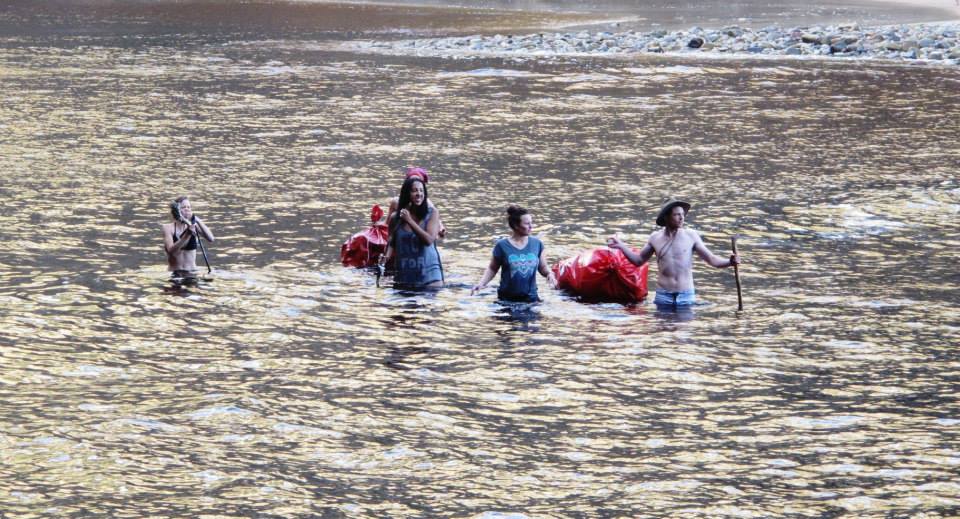
Some obstacles or types of terrain will require special preparation. A river crossing for instance might require a strong plastic bag (aka survival bag) to float backpacks in, or crampons and ice axes for glacier walking.
That’s all for now on Technical and Sleeping Gear. Check out Part 3: Eating Well & Putting it all Together
If you haven’t read it yet, check out Part 1: An Introduction to Garb, Gear & Grub
Sign up for our Newsletter and follow us on Facebook so you don’t miss a thing.


Check out the tent discussion on the forum!
https://community.hikingsouthafrica.co.za/t/hiking-tents-the-good-the-bad-and-the-ugly/135